

Not too shabby, huh?
We ended up following the materials and steps in the original post fairly closely, but with a few changes. Here's a recount of our approach, with pics!
Materials List:
- Canvas Art
- Set of 8x10 pre-stretched canvases (one per letter in your child's name). We got ours at the local dollar store, so they were super-cheap!
- Tempera paints. Go for at least the three primary colours and white, as you can make other colours from these.
- Paint brushes of different sizes/thicknesses
- Stamps, cookie cutters, stickers, etc. to accent the art. We ended up just using stickers.
- 10-12 small containers for holding/mixing paint
- A big plastic tablecloth/sheet to make things less messy! (optional :)
- Budding artists!!
- Letters
- Set of wooden letters spelling your child's name. We got these at the dollar store as well. They were unfinished, which required the other items on this list. If you feel like splurging & saving some time, you can purchase finished & primed letters instead.
- Sandpaper (both coarse and fine)
- Low-VOC primer
- Paintbrush
- Putting it all together
- Thumb tacks (two per letter)
- Zip ties (one per letter)
- Screw hooks (two per letter)
- Picture hooks (one per letter)
- Measuring tape
- Patience :)
Steps:
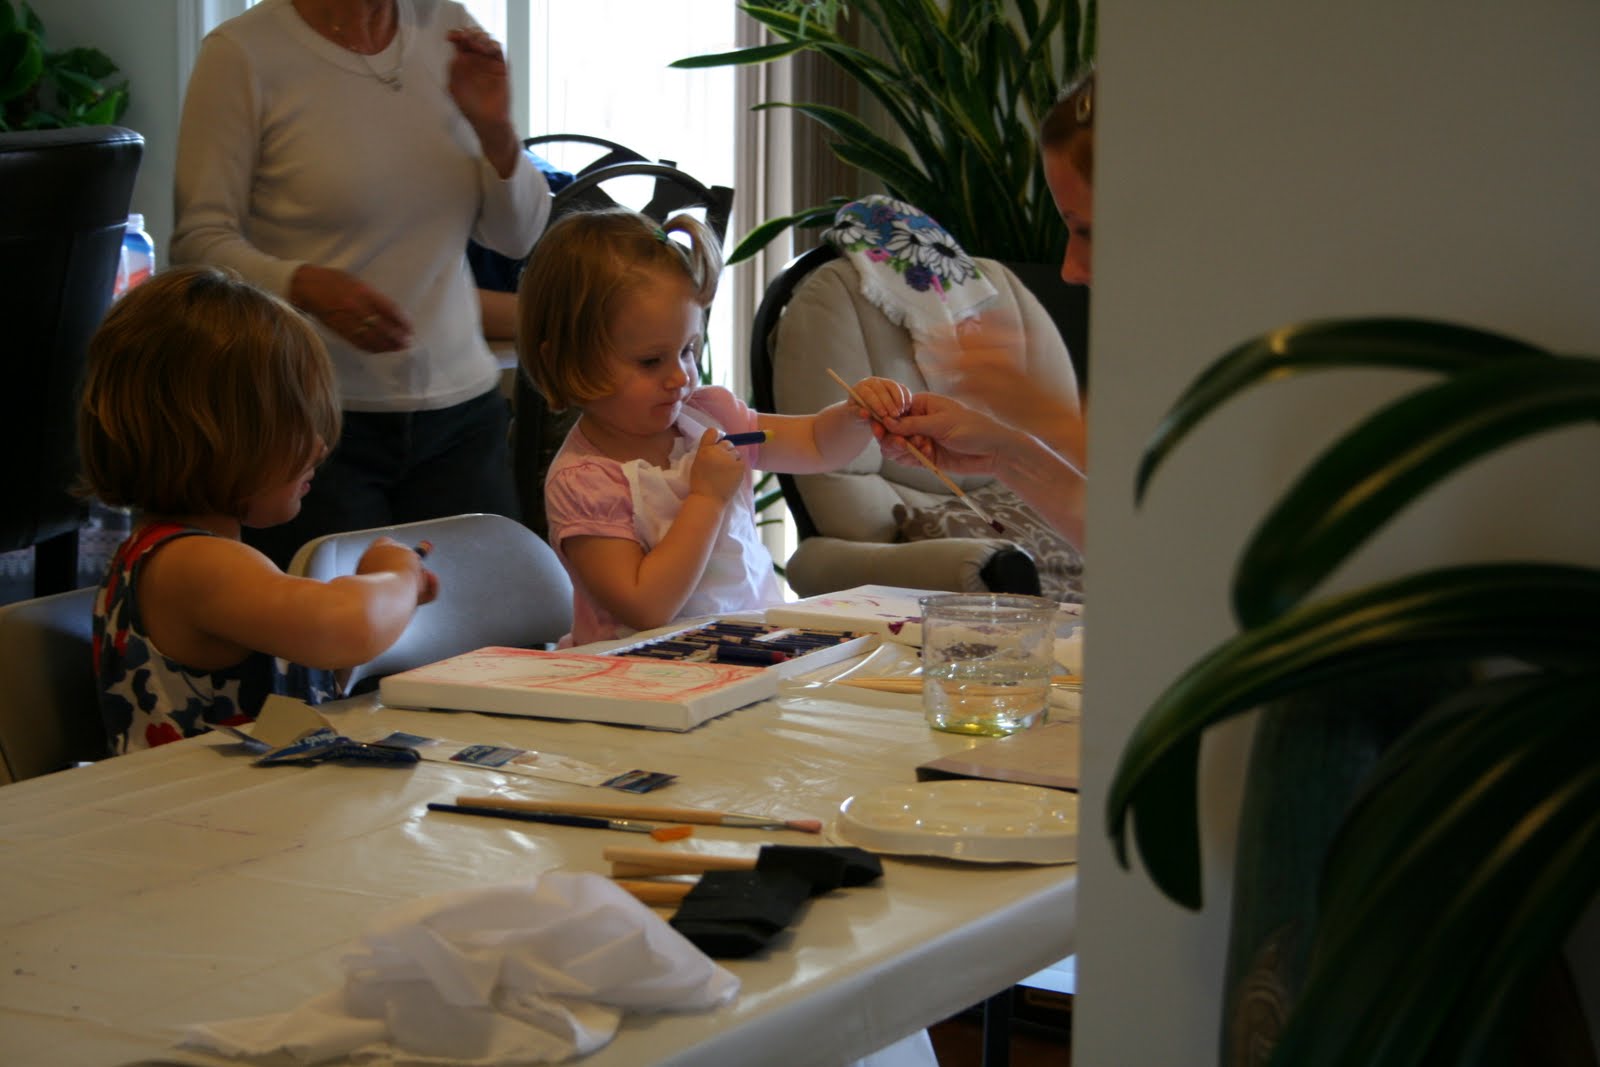
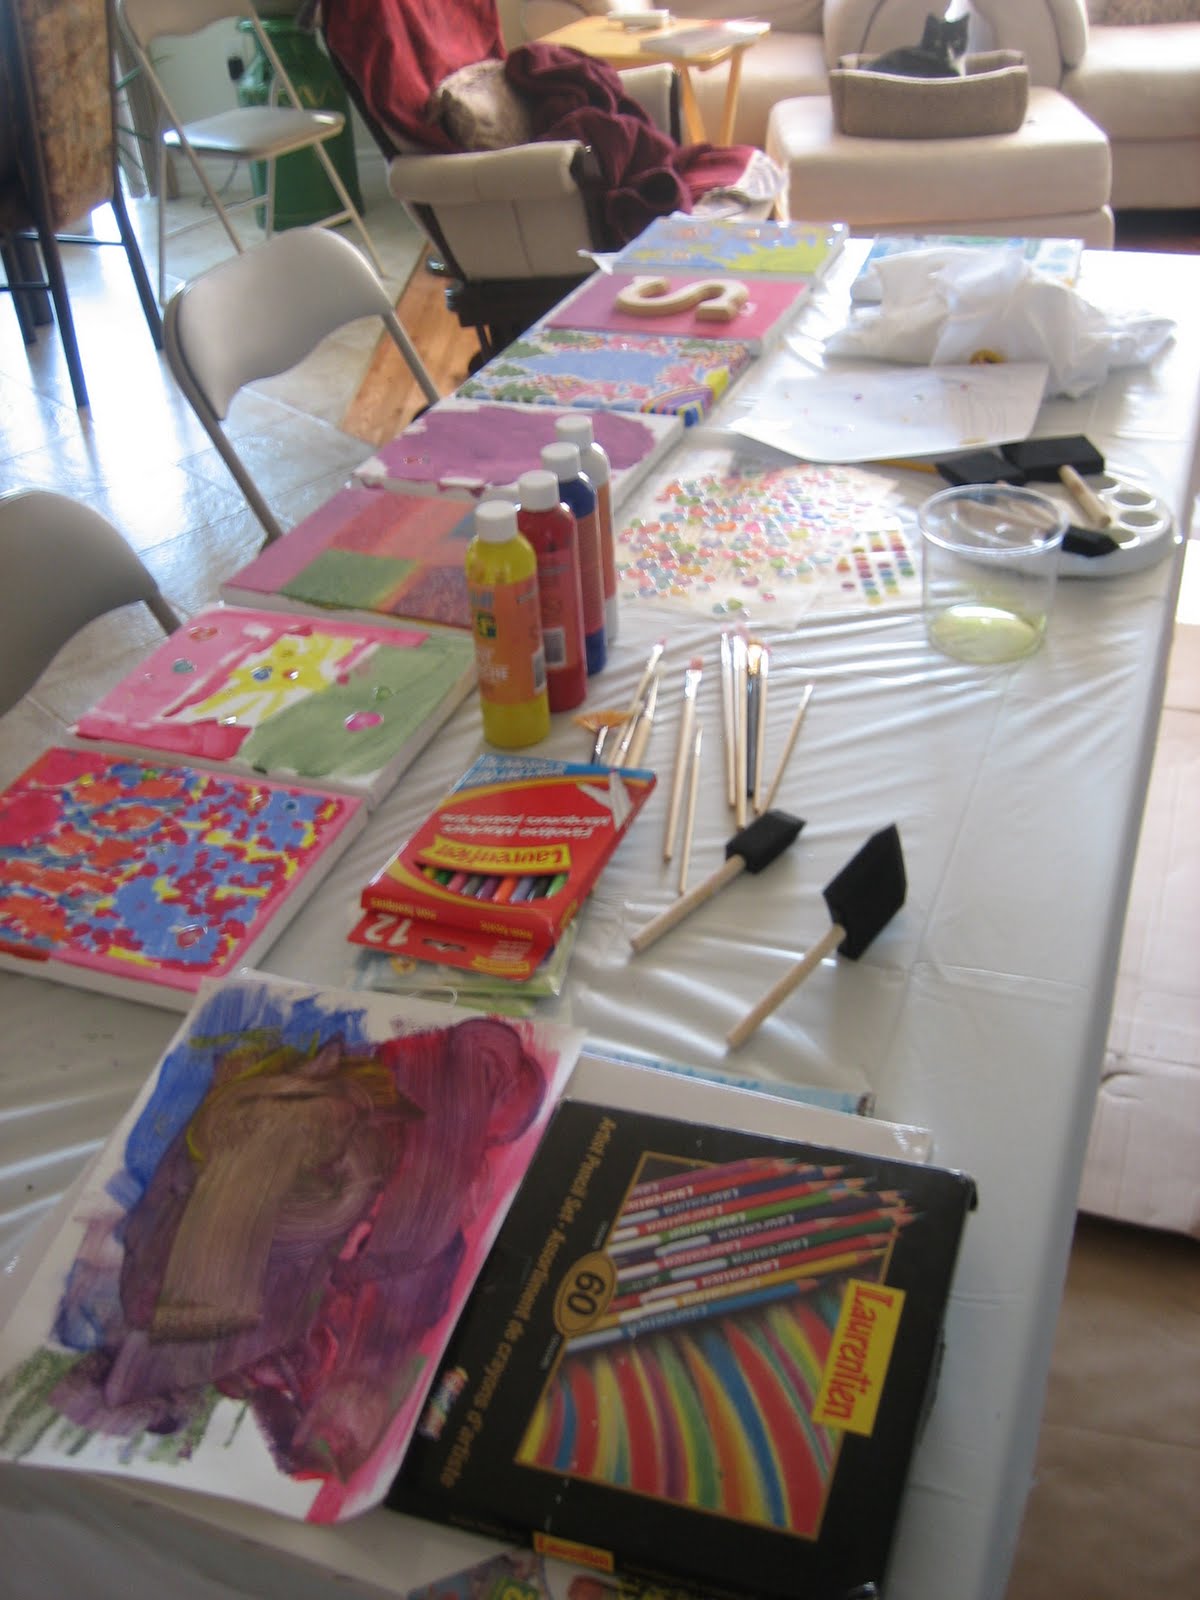
1) Plan an Art Day to decorate the canvases. This is definitely the fun & easy part. :) Invite some budding artists, set up all the materials on a big folding table (covered with a plastic sheet if you so desire) and provide minimal instruction. We invited Chris' family over, including S's (then) 2 1/2 and almost 5-year-old cousins! Everyone who came finished one canvas, which resulted in some wonderful variation in designs, colours, etc.
Tracey, Anne Marie and the kiddos let their creative juices flow at the big table!

Meanwhile, Chris' mom settled in at the breakfast bar, creating an intricate masterpiece. :)

While the finished canvases dried, we teased everyone with a lone "S". Although they guessed away and pried for more hints, that's the only one they got. :)
2) Sand the letters twice (with coarse followed by fine sandpaper). (Skip this step if you purchased finished letters.)
3) Paint the letters with the primer. Use a second coat if desired. (Skip this step if you purchased finished letters.)

4) Assign letters to canvases. You may find (like we did) that some canvases work better with particular letters so that key design elements are visible.
5) Attach letters to canvases using thumb tacks. For each canvas, first center the letter and then secure it with two tacks - one at the top and one at the bottom of the letter. The tacks should easily slide through the back of the canvases and into the letters, however if you prefer to use a different approach, you could use an adhesive such as Liquid Nails (see original post).
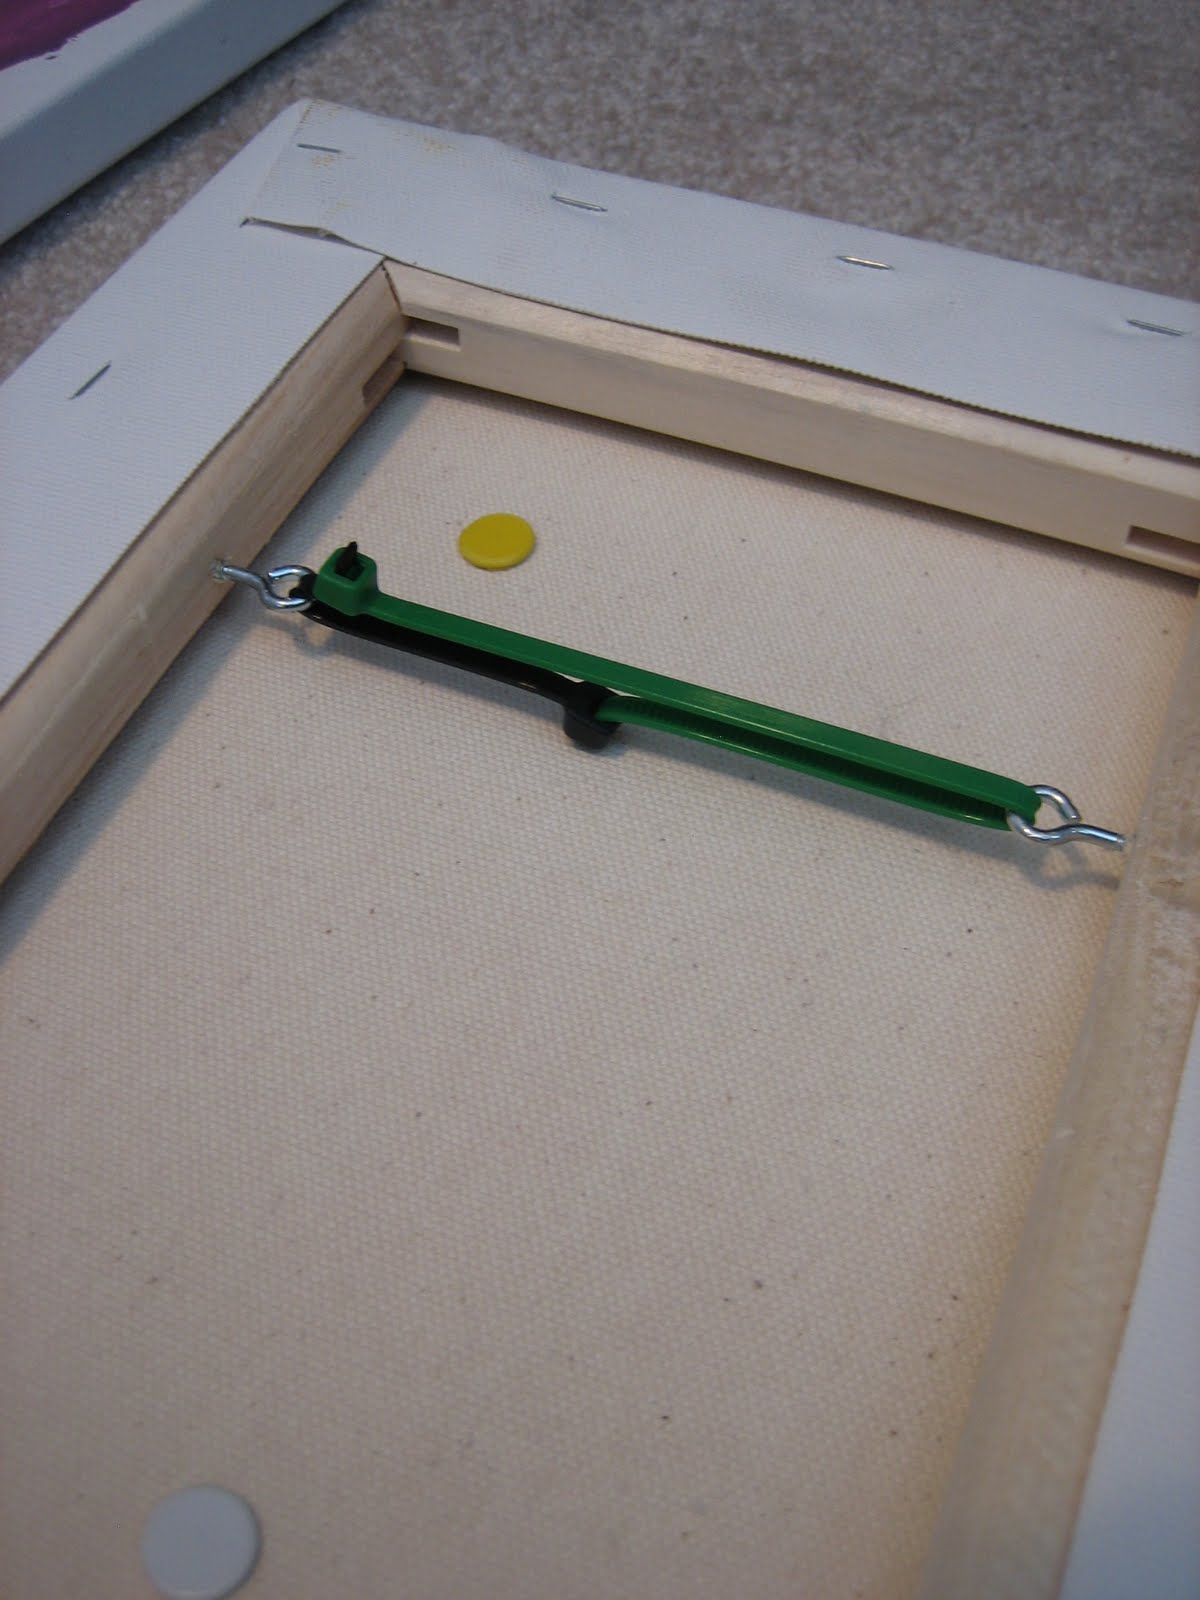
6) Insert screw hooks and zip ties into the backs of the canvases. Note: if you prefer a different method of hanging your canvases, go for it! However this is the approach that worked for us.
7) Measure distances (optional - feel free to just eyeball if you're good at this) and hammer picture hooks into wall.
8) Hang canvases.

9) Step back and admire the finished product!

Definitely a memorable project! I hope this inspires others to embark upon it as well!
What about you? Care to share any baby and/or home decor related Do-It-Yourself projects of your own which had amazing results?
I'm a big fan of framing kids art and absolutely love this idea!! I'll be stashing this one away for future use. The artists must be thrilled to see their work displayed in such an important place in the house. :)
ReplyDeleteI love it! In fact, I think it's going to be a little project for my two little ones to help spruce up their bedrooms! Thanks for sharing!
ReplyDelete~Jenn
Glad you both like the idea! Jenn, would love to see result pics if you do decide to embark upon the project with your own little ones! :)
ReplyDeleteThe bedding is so beautiful! I love it! As always so many good idea.
ReplyDelete